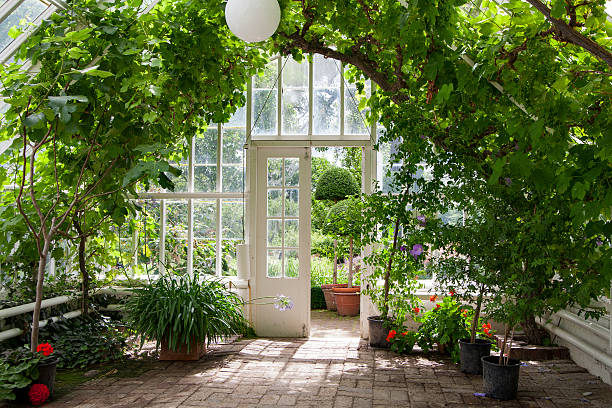
A greenhouse provides an ideal growing environment and atmosphere for plants throughout the year, making it the ultimate gardener’s dream.
Not only does it have several benefits over outdoor gardening, but it is also easily installed through a handful of DIY tools and tips.
This article is here to help you install your dream greenhouse in eight easy steps.
Step 1: Choose the Perfect Location
Choose a proper place and season when building your greenhouse. Aim for a location that gets at least six hours of daily direct sunlight to create the adequate warm atmosphere your plants need. A south or southeast-facing site is your ideal choice.
Steer clear of buildings, big trees, or anything that can obstruct sunlight or cast shadows. Also, think of convenience and accessibility in both summer and winter. For example, in winter, you would want the greenhouse near your house for daily gardening upkeep.
In addition, make sure the location drains properly to prevent water accumulation, structural problems, and plant health issues.
Step 2: Decide on the Greenhouse Type and Size
Greenhouses range from small cold frames to full-sized walk-ins. Your decision will depend on your space, your budget, and the kind of growth you want.
Regarding space, a bigger greenhouse comes with more spacious flexibility and temperature stability. However, it costs more and requires time-consuming maintenance. Ideally, a greenhouse of 2×3 metres gives most home gardeners enough space to grow different plants without excessive upkeep.
There are several greenhouse types to choose from.
- Lean-to. They save space since they are attached to the wall.
- Freestanding. They can be placed anywhere and come in a range of sizes.
- Micro. They are little, portable, and fit for confined areas.
Step 3: Select the Right Materials
The lifetime and efficiency of your greenhouse depends on the quality of the materials you choose. Two key elements that need careful consideration are the frame and glass covering.
The typical materials for constructing frames are wood, aluminium, and PVC. Although wood is aesthetically eye-pleasing, it needs extra attention to stop deterioration. Aluminium is a common type as it is low-maintenance, lightweight, and rust-resistant.
On the other hand, PVC is cost-effective and easy to work with. However, it’s not as durable over time.
Moreover, glazing materials also impact heat retention and light transmission. The materials needed for glazing are polycarbonate, glass, and polyethene film. While both glass and polyethene film are lightweight, they break easily.
Polycarbonate, on the other hand, is sturdy and has great insulating power. It usually is the best option for balancing light diffusion, insulation, and durability.
However, this will be discussed in-depth later on.
Step 4: Lay a Solid Foundation
A strong base is crucial to the stability of your greenhouse. Your greenhouse weight and size will determine its foundation material.
For larger greenhouses, concrete slabs provide the finest stability. It is robust and offers a strong smooth ground.
Smaller greenhouses, on the other hand, require timber, which is a basic, reasonably priced choice that fits perfectly. However, it only needs to be treated for future rotting.
Both sizes need a gravel foundation which has a great drainage and is easy to put together.
Before building the foundation, even out the ground so that it supports your construction without irregularities. Finally, anchor the greenhouse frame firmly with treated wood planks or concrete blocks.
Step 5: Assemble the Frame
Once you have your basis set, it is time to put the greenhouse frame together. If you are utilising a kit, pay close attention to the manufacturer’s directions. Measure twice and cut once.
Later, make sure each part fits tightly together, then fasten the frame joints by bolts, braces, and screws.
Finally, take a general look at the door and vent positions during assembly.
Ensure you carefully choose the materials you assemble the framing with because they will affect every upcoming stage.
Step 6: Install Glazing
Your greenhouse begins to come alive when you install the glazing. Furnishing your glass is the process of adding polycarbonate, film, or glass to the frame. You can attach your preferred material through bars, screws, or clips.
After you install it, make sure the glass is properly sealed by using weather-resistant sealants. Glass sealing is particularly important to eliminate drafts and pests out of the greenhouse.
If direct sunlight is still getting through your glazed greenhouse, you can always use shades.
Step 7: Set Up Ventilation and Irrigation
Adjust the temperature and humidity within your greenhouse through a ventilator. Install the vents on the bottom edges of your greenhouse and at the roof to let fresh air in and hot air out. Without this step, your plants could overheat or grow mildew.
Automatic vents particularly help stabilise your growing environment without continuous manual adjustments. Not to mention, they open and close according to the inside temperature. In bigger greenhouses, you can add an electric fan to aid in circulating air.
The second complementary step is hydration. Create a good irrigation system to save time and ensure proper hydration of your plants.
Drip irrigation is optimal for your greenhouse as it sends water straight to the roots, lowers waste, and prevents excessive humidity.
Step 8: Furnish and Start Planting
The process of furnishing and planting your greenhouse is self-explanatory. You simply maximise space and arrange your plants.
Once you remove anything in the way, start planting your favourite crops, herbs, flowers, and all your preferred plants.
The planting process depends on the designed dynamic of your greenhouse. Accordingly, you can grow seedlings straight into the ground, in raised beds, or in containers. Keep them healthy by warding off pests and adjusting the temperature.
You can control the temperature to your liking by using thermometers and hygrometers. A cool non-humid temperature helps stabilise an ideal growing environment for your plants.
If you are having a hard time building your greenhouse, don’t worry about it. You can always call in a professional gardener to help you set up your ideal greenhouse.
Conclusion
Hopefully, these eight easy ideas have helped you easily install your greenhouse, plant your preferred seedlings, and protect them from harmful weather conditions.
Whether you are a novice gardener or an experienced one, building your own greenhouse opens the path to year-round gardening success.
So, pick the right site, tools, and materials to savour the process of creating your own plant paradise!


