Electric vehicles (EVs) are becoming increasingly popular in the UK. Many drivers are making the switch to reduce their carbon footprint and save money on fuel.
However, most EV owners charge their car at home, which requires installing a home EV charger. This raises the question – can you install an EV charger yourself?
The short answer is yes, you can install a home EV charger if you have some DIY knowledge and experience.
However, there are some important things to consider before taking on an EV charger installation project. This guide will walk you through everything you need to know to install your own EV charging point.
Do You Need Professional Installation?
While a competent DIYer can install their own EV charger, for many people professional installation is the best option. An experienced electrician will ensure the installation is done safely and correctly.
You can consult an electrician in Rocklin (or in your local area) to assess your home’s electrical system and determine the best placement for the charger.
They can also provide certifications and paperwork you may need for insurance purposes or electric vehicle grants. Professional installation takes the hassle out of the process but does come at an added cost. On average, professional installation ranges from £800 to £1,200 depending on your location and the complexity of the job.
Below are some instances when professional installation is advisable:
-
You lack confidence in your electrical skills. EV charger installation involves dealing with high voltage. If you are not 100% confident working with electrical systems, leave it to the professionals.
-
Your electrical system needs an upgrade. Most standard domestic supplies will not handle an EV charger without upgrades. This often includes new cabling and a stronger fuse box.
-
You need permits or inspections. If permits or inspections are required in your area, it is best to use a certified electrician who can handle the paperwork.
-
Your parking area is far from your fuse box. Long cable runs will increase labour and material costs for installation.
If your situation is straightforward, with your parking location close to the fuse box and no electrical upgrades needed, DIY installation may make sense.
Can I Get a Grant for Professional Installation?
The UK government offers grants to reimburse homeowners for some of the costs of getting an EV charger professionally installed. The Electric Vehicle Homecharge Scheme (EVHS) provides a grant of up to £350.
To be eligible, you must:
- Own an electric vehicle (either pure electric or plug-in hybrid)
- Have off-street parking where the charger can be installed
- Use a certified installer from the EVHS authorised installer list
The grant fully reimburses the customer for 75% of the installation costs, up to £350 including VAT. This can cover a significant portion of the overall expense.
Check the eligibility requirements on the EVHS website and determine if this grant makes sense for your situation. The grant combined with professional installation may end up costing about the same as DIY – with less hassle and safety risks.
What Do I Need to Install an EV Charger Myself?
If you decide to take on installing your EV charger, there are several components you will need:
Electrical Supply
Your existing electrical supply panel and wiring must be sufficient to handle the additional load from an EV charger, which can draw up to 7kW of power. This usually requires having a spare 40-amp breaker slot in your consumer unit.
If your electrical panel is already at capacity, you will need an expensive upgrade by an electrician before installing the charger.
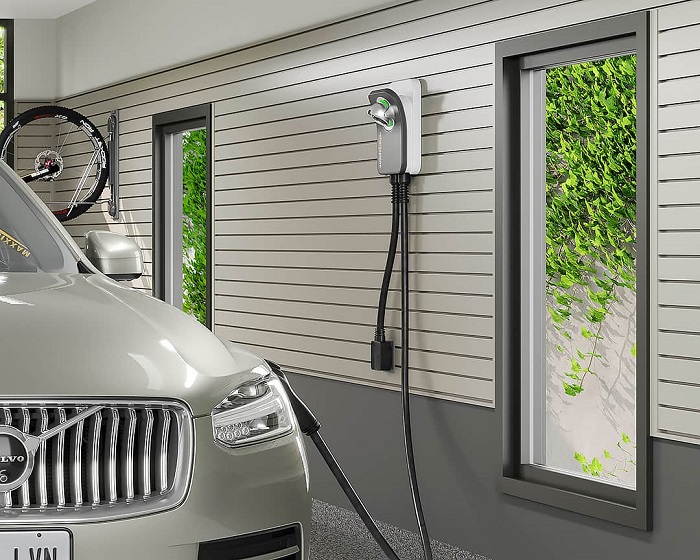
EV Charging Unit
This is the actual EV charger station that mounts to your wall and delivers power to your vehicle. There are two types:
-
Smart Chargers – These connect to WiFi and allow control via an app. This lets you schedule charging times and monitor energy usage. Smart chargers cost more but provide greater functionality.
-
Basic Chargers – More affordable option but without app connectivity and controls. Basic chargers simply deliver a constant power output when the car is plugged in.
When selecting your charger, consider whether you need any smart features. Also ensure the charger’s power output matches your car’s ability to accept power. Faster 7kW chargers require three-phase electrical supplies.
Cables and Connectors
You will need cabling to run from your consumer unit to the charger location, as well as a connector that is compatible with your particular EV. The connector attaches to the charging cable that plugs into your car.
Common connector types are Type 1, Type 2, CHAdeMO and CCS. Consult your EV manufacturer to determine which connector you need.
Tools
At a minimum you will need:
- Voltmeter
- Electrical screwdrivers
- Wire strippers
- Crimping tool
- Drill
- Spirit level
- Tape measure
- Personal Protective Equipment (PPE) – safety goggles, gloves, mask
Having the proper tools for the job will make the installation process smoother.
permits
Depending on your local regulations, you may need a building permit or electrical inspection before using a self-installed EV charger. Research the requirements in your area. Any required permits and inspections will add time and potential costs to the project.
Step-by-Step Installation Guide
Once you have all the necessary supplies and tools, you are ready to tackle the installation. Follow these steps for safe DIY EV charger installation:
Step 1: Turn Off Power
The first step is to turn off power at the main breaker panel. Use a non-contact voltage tester on the wires to confirm power is off before working with any electrical connections or wiring.
Step 2: Install New Breaker
Your EV charger will require a dedicated circuit with the appropriate amperage breaker. Typically a 40 or 50 amp breaker is used. Follow your consumer unit manufacturer instructions to safely add a new circuit breaker.
Step 3: Run Conduit to Charger Location
You will need to run protective conduit from the consumer unit to the charger location. The conduit houses the wiring that will power the EV charger. Use flexible metallic conduit and secure it safely along walls, floors or ceilings between the two locations.
Step 4: Install Charger Mounting Bracket
Determine the ideal position on your wall or mounting surface to install the charger. Allow enough height to plug in the connector. Mark the bracket holes, drill them, then secure the bracket with appropriate fasteners. Make sure the bracket is level and the mounting surface is solid.
Step 5: Pull Wires Through Conduit
Carefully pull the necessary wires through the conduit from the consumer unit to the charger location. Typically 6 mm^2 3-core armoured cable is used. Ensure you have about half a metre of excess cable at each end.
Step 6: Connect Wires
Refer to the charger manual for wiring diagrams. Connect the cable wires to the charger, matching colours/polarities. Use crimp connectors to securely fasten stripped wire ends to the charger.
Step 7: Complete Electrical Connections
Return to the consumer unit and connect cable wires to the new dedicated breaker. Double check the connections are secure.
Step 8: Mount Charger
Hang the EV charger on its bracket and use the manufacturer’s instructions to fully attach it. Arrange the cable neatly behind.
Step 9: Replace Power and Test
With your EV disconnected, turn main power back on at the consumer unit. At the charger, check for proper operation and charging status lights. Plug in your EV and verify it begins charging.
Step 10: Finish the Installation
Make any final adjustments to positioning of the charger and its cable. Add any additional mounting, wall plates, or protection as needed for a clean permanent finish.
Advice for DIY EV Charger Installation
If you choose to install your own home EV charger, keep the following tips in mind:
- Carefully read the entire charger manual and follow instructions precisely.
- Take precautions for working safely with electricity.
- Only work on components you are completely comfortable with.
- Do not hesitate to call a professional if you have any doubts.
- Check local building codes for any permits and inspections required.
- Test thoroughly before regular use of the charger.
- Ask an electrician to inspect your work for safety.
For most EV drivers, using a professional installer is the simplest choice. But with proper precautions and attention to electrical safety, an experienced DIYer can install their own charger and save on costs.
Consult with your local authority to determine any requirements before starting an EV charger project yourself. If needed, visit blackstone-electrical.co.uk to get in touch with a qualified EV charger installer who can ensure safe and proper installation.