Staying warm and comfortable is one of the biggest concerns of homeowners in the winter, especially when you live somewhere with a freezing cold climate. Radiators just never seem to do the trick, and you end up with extortionate energy bills. Fireplaces are a lot of work, and you find yourself going through a never-ending supply of wood.
That’s where underfloor heating systems come in. They offer a seamless distribution of heat throughout every corner of your home while helping cut back costs at the same time.
Keep reading to find out how you can achieve the ultimate comfort and energy efficiency with underfloor heating.
What is underfloor heating?
Underfloor heating is all in the name. It’s a system placed below your floors, above the substrate of your property. It works by covering every inch of your room, so you have an even heat distribution and complete comfort no matter where you are. There are two main types of underfloor heating systems: electric and hydronic.
Electric underfloor heating systems are the less energy efficient option, but they still offer more savings compared to more traditional methods. Perfect for a singular room, it involves installing a series of cables or heating mats underneath the floor’s surface. When turned on, they work together to heat up your room from below.
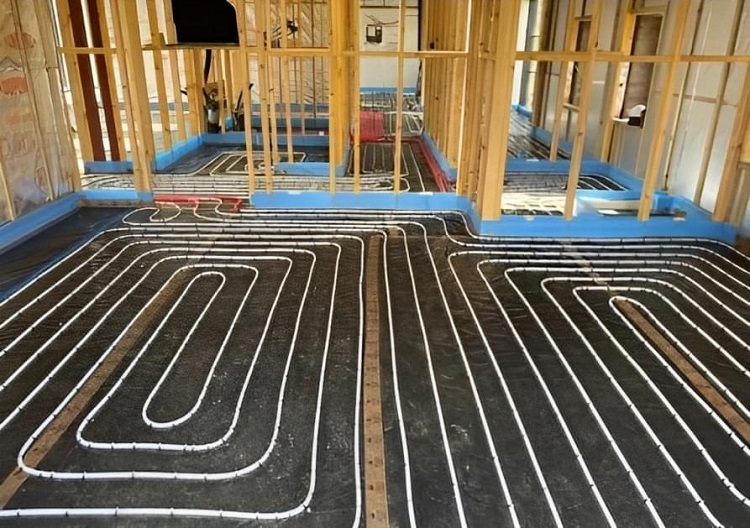
Hydronic underfloor heating, also known as water underfloor heating, is a system that also provides you with unlimited warmth from your floors. Instead of wiring or mats, it involves a range of tubes and pipes connected with each other.
Warm water flows through them, working efficiently to heat up your home. It’s the perfect option when you want to warm up an entire property.
What to consider before installation
If you wish to have an underfloor heating system installed in your home, there are a few things to consider first:
Compatibility with flooring
If you’re retrofitting underfloor heating, you will already have flooring in place, and therefore, you need to ensure they will work well together for maximum efficiency. Similarly, if you’re having the system installed in a new build, you should determine your flooring first.
That’s because underfloor heating works best with materials like tile and wood but not so well with things like carpet.
Insulation requirements
To get the most out of your underfloor heating, you’ll want to add adequate insulation too. This involves adding insulating materials below the heating elements to ensure the warmth goes directly upwards to your room and isn’t lost below the floors.
It’s also a good idea to consider a layer of screed on top, which has insulating properties to help the warmth reach you.
Heating load calculation
All underfloor heating installations need to involve calculating the heating load first. It helps you determine the thermal requirements needed from the system so the best option is put in place.
This includes taking into account things like the size of the room, the insulation levels, and any areas where heat loss might occur. You should also determine what your ideal indoor temperature is.
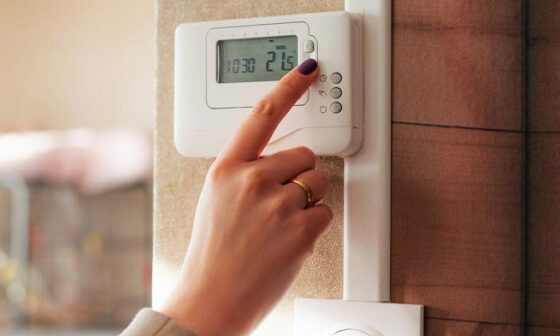
Controls
You need a way to turn your underfloor heating system on and off and adjust the temperature, so it’s important to find a control system you know how to use. If you’re someone who isn’t very good at handling technology, you’ll want something more user-friendly. You can always talk to your engineer about what options there are first.
Installation process
The installation process for underfloor heating is pretty simple once you know how it works. Below is a simple step-by-step procedure, but keep in mind that it can vary based on the type of system you’re having installed.
1. Preparing the floors
Before you can do anything, you need to ensure your floors are in order. If you’re having the system retrofitted, this means removing any existing materials.
You then need to assess the condition of the floor and ensure it can handle an installation. If all is okay, then you must prepare the subfloor by cleaning it and removing any debris.
2. Installing the heating elements
It’s now time to put the important parts in place. If you’re opting for an electric system, the cables or heating mats will be laid above the substrate and any additional insulation. If you want a water system, then the pipes will be put in place instead.
All connections are made, and the underfloor heating is then secured and hooked up to the control system.
3. Testing the system
Once the underfloor heating is all in place, you want to ensure it works before you add your screed and flooring. Check that everything is heating up the way it should, and try adjusting the temperature on your control panel. If it is all running smoothly, it’s time to cover it up and start enjoying the warmth in your home.
Maximising efficiency
Underfloor heating is known for being one of the most energy-efficient central heating methods available today. However, there are some practices you can put in place to ensure it runs as smoothly as possible, keeping your bills down each month:
- Insulate both your underfloor heating system and property as much as possible. If you have many gaps in your windows or doors, it’s a good idea to use sealants or door stoppers to prevent any cold air from getting into your home.
- Control the temperature as much as possible. Don’t keep your system on the highest heat if you don’t need to. Similarly, you might want to set a timer on your controls so the system isn’t running when you aren’t home.
- Regularly maintain your underfloor heating system. When your system is running smoothly, it’s using less energy. If you’re starting to notice your bills going up, consider scheduling a maintenance check with a professional.
Final thoughts
Underfloor heating can offer so much to a home, so if you are looking for a more sustainable way to heat up your property and feel comfortable, it’s definitely an option you should consider. However, ensure you use a trained professional for the installation to prevent any issues and ensure it’s up and running for as long as possible.